To reach your audience online, you need to publish organic and paid content on the platforms they spend time on. With billions of users, Facebook is most likely one of those platforms.
However, since B2B audiences tend to be on Facebook for personal reasons instead of professional ones, you also need to be mindful of how your targeted content is impacting their experience online. Facebook lead ads provide a way to reach your desired audience without overly disrupting their social media experience.
What Are Facebook Lead Ads?
Facebook lead ads are promoted forms that allow users to engage and convert on an asset directly within the Facebook news feed.
When somebody clicks on this promoted ad, a form renders within their news feed and auto-fills relevant information from their profile, like first name, last name, job title and location. Additionally, lead forms give the advertiser the option to ask custom questions using blank form fields or drop-down picklists.
Facebook lead ads are beneficial because the conversion happens within Facebook, rather than invasively removing users from their current experience and driving them to an external landing page. Plus, the auto-fill functionality is proven to reduce form friction, leading to higher conversion rates.
The auto-fill feature does have one caveat, though. Because the information is being pulled from the user’s Facebook profile, you’re going to see a higher percentage of non-business contact information than you might advertising through other channels. However, if needed, you can always disable the auto-fill for those fields.
How to Set Up Facebook Lead Ads
1. Create ad assets
Prior to launching a Facebook lead ad, you need to have:
- An image
- Ad copy
- Form copy
- A thank you message
- A privacy policy
- A conversion opportunity.
For your ad to be compatible with the most placement opportunities, your image should be available in both a 1200x628 format and a 1080x1080 format.
When crafting your ad copy, we recommend that your introductory text stay less than 140 characters, your headlines stay under 75 characters, your form headline be shorter than 60 characters and your form body copy be under 160 characters. There is no limit for the thank you message though.
The privacy policy you need for these ads will be the same one you include for form fills on your website. So, it can be text directly surrounding the form, or it could be a standalone web page.
2. Create a campaign in ads manager
In Facebook ads manager, create a new campaign with “lead generation” as the campaign objective.
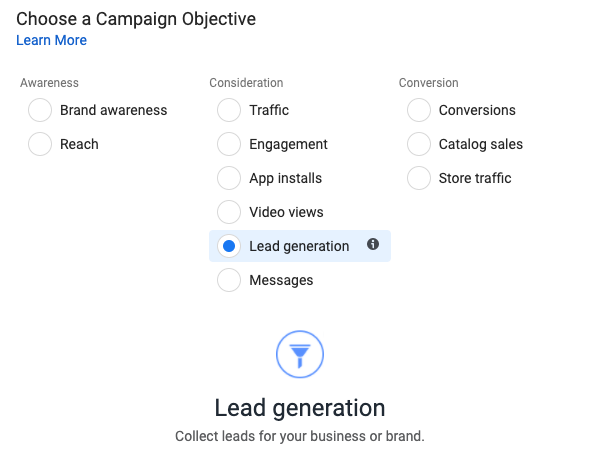
Within that campaign, you can then create individual ads and ad sets.
3. Set up your audience
Once you’ve created an ad set, you’ll be able to select from existing audiences or create a new one for it.
Facebook has multiple types of audiences you can use:
- Retargeting based on Facebook activity
- Retargeting based on an uploaded contact list
- Manual targeting built on Facebook data like demographics, interests and behaviors
- Lookalike audiences, which target unknown individuals who share characteristics with an established audience
For B2B, the most effective audiences for Facebook ads tend to be retargeting based on website visits, retargeting based on uploaded contact lists and lookalike audiences of those two.
4. Select your placement
Once you’ve established who your ad will be shown to, the next step is to determine where it will be served to them.
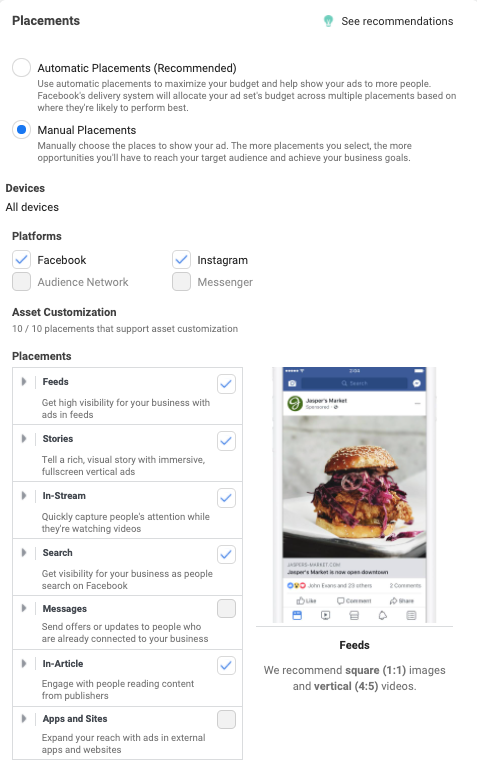
Ads can be placed on Facebook, Instagram, Facebook Messenger and within Facebook’s extended audience network, such as apps and games. Within those platforms, there are different places they can be served, such as within news feeds and through stories.
You can select your placements manually or allow Facebook to choose for you automatically.
Due to the format of lead ads, we recommend only placing them within the Facebook news feed.
5. Upload your ad
Now that the settings for your ad set are complete, it’s time to upload the assets you’ve created.
Name your ad, select the Facebook page it's associated with and input the images, copy and CTA.
There are multiple CTA options, including a website link, a Facebook event and a phone call. We find website links that drive to content offers to be the most effective. However, when choosing a CTA link, keep in mind that Facebook doesn’t support driving users directly to a PDF link. Instead, you’ll need to direct audiences to a landing page with a button for that PDF.
Finally, for tracking, select the website pixel associated with your website so you can report on your ad’s performance.
6. Create form
On the same page where you’ve uploaded all your other ad assets, you’ll also be able to choose which form to use. Since your copy should be specific to the offer you’re promoting, create a new form here.
After clicking the “Create new form” button, name your form, paste your headline and body copy and add the questions you want to ask.
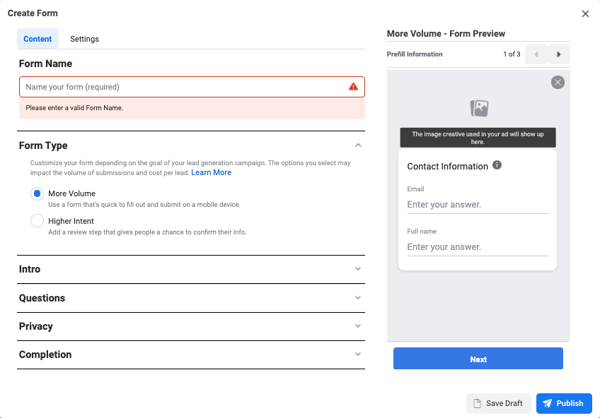
Next, either link to your privacy policy or write out the text version.
Then set up your thank you message and attach the CTA link.
7. Publish your ad and set up lead syncing
Once those steps are completed, you can publish your ad and start converting Facebook users.
But don’t forget this final, critical step: for the leads you convert from those ads to go into your CRM, you’ll need to connect the two platforms. The steps you’ll take to do this will vary depending on what marketing automation platform and CRM you use.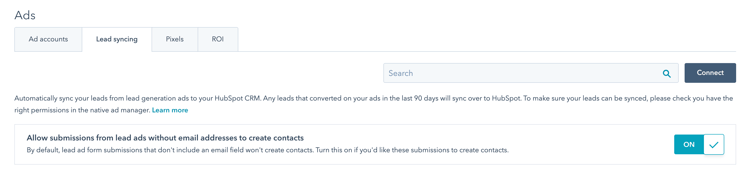 In HubSpot, you first connect Facebook Ads through ad settings, and then you authorize lead syncing through the lead syncing tab of ad settings.